Blender 3D: Noob to Pro/Basic Carpet Texture
|
|
Applicable Blender version: 2.49. |
Goal
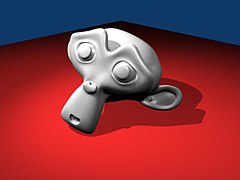
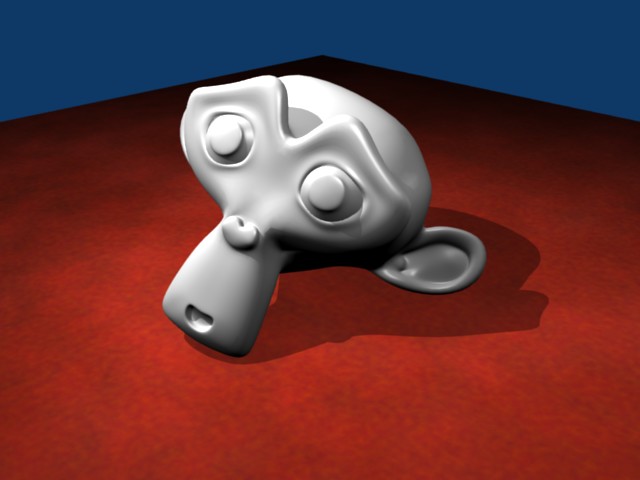
[edit | edit source]I am using a basic scene that I quickly set up before I started to create the carpet material. It shows a monkey (suzanne), a plane, camera, 3 area lamps and 1 spot lamp.
The purpose of this tutorial, is to highlight the power of blenders built in shaders and procedural textures to create a carpet material to use in your scenes.
NOTE:  For those of you needing help getting a similar scene to the one above, here are some axis positions,etc. to help out:
(Spot-Lamp)-X=1.62,Y=0.86,Z=6.74;rotation-X=37.26,Y=3.16,Z=181.34;
(Area-Lamp-1)X=4,Y=3.27,Z=4.12;rotation-X=54.67,Y=-18.59,Z=-109.47;
(Area-Lamp-2)X=-2.07,Y=-2.08,Z=4.85;rotation-X=29.37,Y=-28.98,Z=355;
(Area-Lamp-3)X=0.315,Y=-2.89,Z=4.29;rotation-X=49.23,Y=-10.63,Z=6.68;
(Monkey)X=0.05,Y=0,Z=0.42;rotation-X=58.61,Y=-16.07,Z=23.245;DIM(dimensions)X=2.734,Y=1.969,Z=1.703;
(Plane)x=0,y=0,z=0;(no rotation);Dimensions: X&Y=14.30,z=0.
Alternatively, you could also download a pre-made file in case that you're in a hurry.
Noob Note: Try adjusting each of the area lamps Dist(ance) value.
Noob Question: How does the above coordinates help me at all? I haven't found anything that tells me were in 3D space object actually is or the objects dimensions little alone control them. Nothing in the Tutorial up to now even gives a clue to this.
Noob Answer: Hit 'N' to bring up the Transform Properties window and enter the values there.
The Basic Material and Shader Settings
[edit | edit source]For the basic material for the carpet set the color settings of your material as follows -
Col (R 0.714) (G 0.134) (B 0.134) Dark Red
Spe (R 0.590) (G 0.210) (B 0.084) Reddish Brown
Mir (R 1.000) (G 1.000) (B 1.000) White
Noob Note: Copy paste-able hex values: Dark Red (DC6666), Reddish Brown (CA7E52) and White (FFFFFF)
Change the specular shader to ('phong') and leave the default lambert diffuse shader as it is. Change the ('spec') to [0.13] and the ('hard') to [12]. Lastly click the ('Full Osa') button to enable it. If you render now you will notice that the plane looks like an ugly pastel color (if not, you have a different lighting setup to mine and the shader will not look the same as the images in this tutorial.) Don't worry about this ugly looking plane it will soon be a beautiful carpet.
Cloud Texture 1
[edit | edit source]Press 'F6' on the keyboard to bring up the texture panel. Click the bottommost of the long boxes to create a texture in the bottom channel. Create a new texture and rename it something like 'Red Clouds 1'. From the ('Texture Type') pull down select clouds. In the 'Clouds' settings panel change ('NoiseSize') to [0.210] and ('NoiseDepth') to [4].
Now select the Colors tab which will bring up the ColorBand for the texture. Press the orange ('Add') button to add a cursor on the colourband. Next make sure the 'Cur : 0' is showing next to the add button and change the colours as follows - (R 0.770, G 0.168, 0.168). Now click on right side of the 'Cur : 0' so it shows 'Cur : 1'. Change 'Pos' to 0.6. Set Alpha to 1 and change the colour to (R 0.732 G 0.243 B 0.243).
Now go back into the material settings and change the settings in the Map To tab as follows. Click ('Spec') twice so the text becomes yellow do the same for ('Hard'). Now select 'Subtract' for the texture blending mode. Change ('Col') to [0.188].
At this stage if you render you might find it hard to notice the difference, it is apparent only where there is low light levels on the plane, don't worry about this at the moment. It means if you render with Ambiant Occlusion you get a nice carpet effect of slightly varying colour.
Cloud Texture 2
[edit | edit source]Go back to the texture panel and create another texture, call it 'Clouds' and put it in the channel above 'Red Clouds'. Change ('NoiseSize') to [0.054] and ('NoiseDepth') to 4. Select 'Improved Perlin' from the Noise Basis pull down. Finally change ('Nabla') to [0.031]. Do not change any more settings here.
Now in the material panel, under the Map To tab change the following - Click ('Nor'). Click ('Spec') and ('Hard') twice so as they are yellow.
As you can see the material is starting to look a bit better, only 2 more textures to go.
The Final Cloud Texture
[edit | edit source]Switch to the texture panel once again and create a new Clouds texture in the next channel up. Change ('NoiseSize') to [0.010] and ('NoiseDepth') to [6]. Now click on the 'Colors' tab and change the colour of the left cursor ('Cur : 0') to (R 0.713 G 0.262 B 0.223) and Alpha to 0. Switch to Cursor 1 ('Cur : 1') and its colour settings (R 1.000 G 0.363 B 0.000) and Alpha to 1.
Now in the materials panel under the 'Map To' tab Click ('Nor'). Click ('Spec') and ('Hard') twice so as they are yellow. Leave the blending mode as 'Mix'. Change ('Col') to [0.464] and ('Nor') to [1.00].
The Last Texture
[edit | edit source]Finally, go to the textures panel one last time. Create a new Stucci texture in the next channel up. Change ('NoiseSize') to [0.006] and ('Turbulence') to [10.94]. Click on the 'Colors' tab. The first cursor 'Cur : 0' should be black with alpha 0. 'Cur : 1' should be red (R 1.000 G 0.000 B 0.000) with alpha 1.
Now go to the materials panel. Under the 'Map To' tab Click ('Nor'). Click ('Spec') and ('Hard') twice. Change the Blending type to 'Subtract'. Change ('Col') to [0.056] and ('Nor') to [0.50]. And that's it. When you render now, you should have a nice-looking carpet material. By tweaking with the colours you can create any colour of carpet.


