Blender 3D: Noob to Pro/Texture Normal Mapping
|
|
Applicable Blender version: 2.46. |
The Texture-Normal
[edit | edit source]To familiarize yourself with normal maps and how they work, we will begin by using the texture engine in Blender to create our first normal map. This process is very useful for creating quick and non-specific normal maps for your projects that need a bit of texture.
To begin, open blender and whatever your basic load settings are, in the 3D view, delete everything so the field is clear. ( A to select all, then X to delete)
Move the 3D cursor to the center of the X,Y, and Z axis ( SHIFT + S Cursor to Center, and switch to top view ( NUM7 ) orthographic view ( NUM5 ). Hit SHIFT + S - NUM4 then CKEY to center your view now. Toggle Quad View, CTRL + ALT + Q or menu View->Toggle Quad View

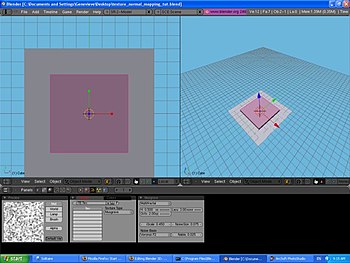
Add a mesh plane to the field, and scale that plane to five times normal size. ( SHIFT + A , select Add->Mesh->Plane, S then NUM5 to scale five times size.) This plane is going to be our base-it will remain untextured so it can be used as a comparison. Don't give it a material.
Now, with the 3D cursor still on the center, add a mesh cube to the field. Scale this cube 3 times in the X and Y directions, and 0.5 times in the Z direction. ( SHIFT + A , select Add->Mesh->Cube, S , SHIFT + Z , then NUM3 to scale 3 times in X and Y directions, S , Z , then . - NUM5 for Z.) This cube will serve as our texture comparison.

For this tutorial, lets use the "Musgrave" texture to make a 3D relief.
Select the cube, and then in the Buttons Window select the material index. Give the Cube a material, and make this material any light color you wish to differentiate it from the base plane (darker colors won't show the relief that well). Now select the texture icon in the material window. Add a new texture, and make that texture Musgrave with the following settings :

- Type: Multifractal
- Dimensions: 0.5
- Lacunarity: 3
- Octaves: 2
- Intensity: 0.45
- Noise:
- Basis: Voronoi F2
- Size: 0.075
- Nabla: 0.025
Excellent, now we are ready to show what we have done! If you return to the material window in the material index, then you will probably be wondering what's wrong-your preview window just shows a sphere with a huge purple splotch! Don't worry, we just haven't applied the texture as a normal map yet, it's still just a color map. Click the "Map To" tab in the material window and you will see a whole row of buttons, menus, and sliders. Currently on the top row of buttons the "Col" button is depressed, which is how the texture knows to apply as a color map. Click the "Col" button to remove the color from your preview window. Now click and depress the "Nor" button and look what happens! An intricate texture embeds itself on the sphere in the preview window. The Musgrave texture has caused a depression texture within the preview. If you happen to click the "Nor" button again, you will see the letters turn yellow and now that means the Musgrave texture is causing an elevation texture. Click it once more and the texture is turned off. Keep the "Nor" button depressed for this tutorial.

Now that you know how that works, let's see what it did to your cube. First, go to front view (numpad-1) and zoom out a bit so about 10% of the screen is filled with your cube. Select the cube and hit Shift-S-key-4-key then C-key to center your view. In the upper-left corner, add a sun-lamp (Shift-A-key, Add->Lamp->Lamp). Adjust the "Dist" Slider to a very far length, to make sure it reaches the cube. In the upper-right corner (make it a little closer to the cube) add a Camera (Shift-A-key, Add->Camera).
Move the Camera to get a better perspective of your work, by rotating it to look at the cube and the plane. If you want exact directions: Switch to top view (numpad-7). Move -4 Units in Y direction. Rotate -75 degrees on Z rotation. Rotate -45 degrees on Y rotation. Now hit numpad-0 to see how well pointed it is to the cube. Make adjustments to your own work if you'd like.
Now you are ready to Render and see how it turned out!

After your first render, I'll let you know that you can adjust the depth of the shading. Select the cube, and in the material index in the "Map To" tab, in the mid-right area, there is a slider called "Nor" that should be set at 0.5. Just to test, set it to 0 and render to see what happens. Then set it to 2 and render to see the results.
After you see it rendered, you probably realized that the edges of the cube were very sharp and didn't have the rocky texture. This is because the 3D relief on the cube is fake--it's not actual 3D, it's the computer just calculating where light should bounce off and in what direction. Imagine how many faces it would have taken to create this texture shading without Normal Mapping.
If you want, you can move the lamp around and see how the light moves around the fake-bumps.

This is best if you just need a non-specific texture, such as asphalt, cement, carpet, or even fabric. Now if you want to do something like make a low-poly brick wall, you will need to a specifically-tailored normal map for such thing. The next section will show you how you can make your own normal map and apply it as well.
