Creating a Simple 3D Game with XNA/Introducing Blender's Interface
First Screen
[edit | edit source]The biggest problem with Blender for new programmers is its learning curve. After a little practice and experience it does become fairly intuitive, but for this reason a gentle introduction to the opening screen and the basic interface is necessary before moving on to making your models.

The following three elements can be seen
- A cube, with a red cursor in the middle
- To the right of that, the light source (a pair of small circles)
- And to the lower right of the middle, the camera (a pyramid)
For purposes of XNA and this tutorial, we do not need to worry about the light source or camera, that will all be handled on the code side.
Basic Controls
[edit | edit source]You can rotate this view around freely by holding down the middle button and moving the mouse, and can be zoomed in and out using a mouse wheel. The numpad can be used to rotate and zoom more uniformly;
- 1, 7, and 3 aligns the current view to an axis
- 4/6 and 8/2 rotates the display by 15 degrees on an axis
- '+' and '-' zooms in and out
The left key moves the cursor (a red and white circle with a crosshair around it) around the screen, by moving this you can change the current view (by pushing 'C' after moving it re-centers it to that position) and dictates the position where new shapes are placed.
The right key selects different objects on the screen, with the currently selected object highlighted in pink.
Editing your Cube
[edit | edit source]Next, select the cube by right clicking on it, then change the view mode from the default object mode, to object editing mode by left clicking on the 'Mode' tab.

Change this to editing mode. While in this mode, you have the option of modifying the different physical aspects of the model, which can be split into three different types:
- Faces, the solid areas of the model, which are surrounded by...
- Edges, lines connected by...
- Verteces, which dictate the different positions of the edges.
This is probably best seen visually by changing between different select modes for these types using the below buttons, and selecting them on the cube.

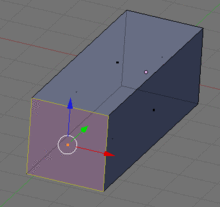
When you select one of these parts (for the sake of the below example pics, one of the front facing faces), they can be edited in the following basic ways:

- Translate, which moves the selected element

- Scale, which allows you to increase the size of the selected parts (by default, around the centre of the selected area)

- Extrude, which acts similar to the above translate, but creates a new set of faces at the extrusion point (which is frankly, a lot easier to understand by seeing and playing with it then it is to describe it)

In any of these editing modes, they can be affixed to a particular axis by hitting the X, Y, and Z key.
Going through the rest of this tutorial, some of the more advanced facets of Blender, and the details behind these functions will be explored through examples, but this at least provides the framework for the creating any simple model.
