Emulation/MSX

About MSX
[edit | edit source]MSX was a standardized computer architecture developed by ASCII corporation and Microsoft that was regionally popular in a number of locations during the 1980's. In particular it was the dominant computer standard in some countries of East Asia, and South America. It also saw some limited use in the education systems of the communist eastern bloc, including the Soviet education system. An MSX computer was even installed on the space station MIR. Because of this, a number of different manufacturers made MSX computers, and the MSX sports a diverse and historically significant software library.
- MSX Standards
- MSX
- MSX2
- MSX2+
- MSX TurboR
- Other MSX lines
- Zemmix (South Korean MSX based game console line)
Common MSX Emulators
[edit | edit source]- BlueMSX - Portable and open source emulator.
- openMSX - Portable and open source emulator. Includes an open source alternative BIOS capable of booting some games.
- fMSX - Portable MSX emulator.
- Nintendo Virtual Console - Commercial emulator for specific officially licensed games. MSX emulation is available for Wii and Wii U only, and will likely be discontinued in the near future as of 2021.
- BrMSX|BrMSX - Emulator for running on DOS based host computers. Development stopped in mid 2000's.
Alternatives to Emulation
[edit | edit source]
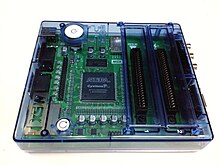
Modern hardware reimplementations of MSX hardware such as 1chipMSX exist.
Dumping an MSX cartridge
[edit | edit source]Many, if not most, ROM images of MSX games and BIOSes are available on the internet. However, their legal status is doubtful (see MAME), some may have security issues, and somehow many have corrupt data. This is a guide on dumping your own ROM images.
If you would like to dump a cartridge which starts at boot time (like many games) there is an extra difficulty. There is no software solution for circumventing this. However, there are slot expanders (expands one slot to four slots) which allow you to turn off cartridges during boot. If you do not have such a thing, you can insert it after boot which can be dangerous (blown up computers have been reported) or modify the hardware.
How the latter can be done depends on the cartridge. However, one type is very well documented. It was common practice to disable the game in Konami SCC cartridges as the sound chip could be used.
Opening a Konami Cartridge
[edit | edit source]Peel off the sticker at the bottom left and right. At both sides, you will find a square hole. Insert a screwdriver in one of the holes, and loosen the notch which is located at the bottom. Try to open the cartridge a little such that the notch isn't working any more. Insert another screwdriver in the gap you have made. Follow the same procedure for the other hole and force the cartridge open.
Disabling Slot Select
[edit | edit source]This method disables the entire cartridge, so any SCC sound chip that is on-board won't work any more, but can be enabled again using the switch we will add.
Cut the Slot Select line. It runs from pin 4 of the connector. If it is an SCC cartridge, it runs to pin 10 of the SCC. Connect the Slot Select signal at the cartridge side +5V using an 3.3K - 10K resistor. Make a switch over the cut line.
Disabling Chip Select on SCC cartridge
[edit | edit source]This method has the advantage that the Konami SCC can still be used without having to switch on the cartridge; only the ROM is disabled.
The largest IC on the board is the SCC. The long flat thing is the D/A converter, which is really a resistor array. The smaller IC is the ROM, which has the RC code printed on it.
Find the CS line from the SCC to the ROM. It's easy to locate because there is a condensor connected to it. It runs from pin 8 on the SCC to the ROM, pin number:
- pin 20 if it is a 1 megabit ROM (28 pins IC)
- pin 24 if it is a 2 megabit ROM (32 pins IC), Nemesis 3 and Space Manbow
- unknown if it is a 4 megabit ROM, Metal Gear 2: Solid Snake
Cut the line between the condensor and the ROM. Now, this is important because it is often forgotten: connect the CS of the ROM with resistor (3.3K - 10K) to the +5V. Make a switch over the cut line to be able to re-enable the ROM.
Saving the ROM image
[edit | edit source]| This section is a stub. You can help Wikibooks by expanding it. |
References
[edit | edit source]| Parts of this page are based on materials from: Wikipedia: the free encyclopedia. |
