RAC Attack - Oracle Cluster Database at Home/Install Instant Client
Appearance
Prev: Clusterware Testing
Services, Failover and Load Balancing (e)
- Install Instant Client
- Service Failover
- Connection Failover
- Runtime Failover
- Client Load Balancing
- Server Load Balancing
Next: RAC SQL and PLSQL
In order to test failover it would be best to connect from a client outside the cluster, so we'll start by downloading and installing Oracle's Basic Instant Client (English-only) and the Instant Client SQLPlus package.
- Login to the node collabn1 as user oracle and open a connection to the database as SYSDBA and unlock the SH user account. Also grant DBA access. SQL> alter user sh identified by sh account unlock; User altered. SQL> grant dba to sh; Grant succeeded.
-
Download Oracle's Basic (English-only) Instant Client and Oracle's Instant Client SQLPlus package. The lab instructor may have made them available, or they can also be downloaded from Oracle's website here:
http://www.oracle.com/technetwork/topics/winsoft-085727.html
The two files you need are:
- instantclient-basiclite-*.zip
- instantclient-sqlplus-*.zip
-
Each archive contains a folder named "instantclient_11_2". Extract this folder (from both archives) into C:\. (In Explorer you can drag-and-drop or you can choose "Extract All" from the File menu.)

-
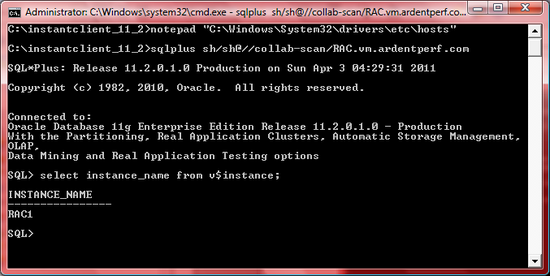
Edit c:\windows\system32\drivers\etc\hosts and add IP addresses for the RAC nodes.
 Your database connections won't work without this - you can't just create a tnsnames that uses IP addresses. Try it out by doing step 4 a few times in a row before this step. Does step 4 sometimes just hang? Do you know why? We'll explore it more later...
192.168.78.250	collab-scan.vm.ardentperf.com collab-scan
192.168.78.61	collabn1-vip.vm.ardentperf.com collabn1-vip
192.168.78.62	collabn2-vip.vm.ardentperf.com collabn2-vip
192.168.78.51	collabn1.vm.ardentperf.com collabn1
192.168.78.52	collabn2.vm.ardentperf.com collabn2

-
Test your Instant Client installation by connecting to the database.
C:\instantclient_11_2> sqlplus sh/sh@//collab-scan/RAC.vm.ardentperf.com

- Create a TNSNAMES files and copy the RAC, RAC1 and RAC2 entries from either cluster database node. C:\instantclient_11_2> notepad C:\instantclient_11_2\tnsnames.ora RAC = (DESCRIPTION = (ADDRESS = (PROTOCOL = TCP)(HOST = collab-scan)(PORT = 1521)) (CONNECT_DATA = (SERVER = DEDICATED) (SERVICE_NAME = RAC.vm.ardentperf.com) ) ) RAC2 = (DESCRIPTION = (ADDRESS = (PROTOCOL = TCP)(HOST = collabn-scan)(PORT = 1521)) (CONNECT_DATA = (SERVER = DEDICATED) (SERVICE_NAME = RAC.vm.ardentperf.com) (INSTANCE_NAME = RAC2) ) ) RAC1 = (DESCRIPTION = (ADDRESS = (PROTOCOL = TCP)(HOST = collabn-scan)(PORT = 1521)) (CONNECT_DATA = (SERVER = DEDICATED) (SERVICE_NAME = RAC.vm.ardentperf.com) (INSTANCE_NAME = RAC1) ) )
-
Test your TNSNAMES by setting the TNS_ADMIN environment variable and running SQLPLUS.
C:\instantclient_11_2>set TNS_ADMIN=c:\instantclient_11_2
C:\instantclient_11_2>sqlplus sh/sh@RAC


