RAC Attack - Oracle Cluster Database at Home/Setup Virtual Storage
Appearance
Hardware and Windows Preparation (e)
- Hardware and Windows Minimum Requirements
- Install VMware Server
- Setup Virtual Networks
- Setup Virtual Storage
- Download Oracle Enterprise Linux
Next: Linux Install
If you are at an event, then the event organizers might provide a special DEMO option - where you can run a pre-configured RAC cluster on your own laptop. In order to use this DEMO option, follow this lab but use the directories on the event-provided external hard drive.
- RAC Attack is carefully designed to use three directories and spread out I/O for the best possible responsiveness during labs. Create these three directories in the destinations that you chose in Hardware and Windows Minimum Requirements, taking the guidelines into consideration. mkdir C:\RAC11g mkdir D:\RAC11g-shared mkdir D:\RAC11g-iso In the RAC11g directory, make sure that collabn1 and collabn2 subdirectories don't exist. rmdir C:\RAC11g\collabn1 rmdir C:\RAC11g\collabn2
-
The VMware Server management interface is web-based, and some new web browsers are not compatible with it. There are two ways to open this management interface:
- Open a non-default web browser and go to the address https://localhost:8333/
- If you are at an event, then the event organizers might have provided Firefox 2.0.0.20 which has been tested with RAC Attack. You can run this browser directly from the Jumpstart Drive without installing it on your PC. This version of firefox can also be downloaded from the internet.
- Launch VMware Server Home Page from the start menu. This will use your default web browser.

- Open a non-default web browser and go to the address https://localhost:8333/
-
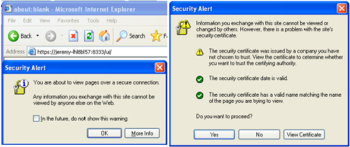
Depending on what web browser you use, you might receive security-related warnings. Proceed through all of these warnings and choose to view the web page.

The warning in Mozilla Firefox 
The same alert in Internet Explorer 6 -
Login to the VMware console with the local windows admin account username and password.

-
On the main screen (Summary tab), find the Commands box and choose Add Datastore.

-
Repeat this step three times. Set the datastore names to RAC11g, RAC11g-shared and RAC11g-iso. Choose Local Datastore and use the directory path which you previously chose and created.

-
VERIFY that the three new datastores exist in the Summary screen – named RAC11g and RAC11g-iso and RAC11g-shared. Also VERIFY that the two networks vmnet1 and vmnet8 are available as HostOnly and NAT respectively.


