Sidux/Useable applications/VirtualBox
Appearance
- VirtualBox (present name: Oracle xVM VirtualBox) is a virtual machine which makes isolated environment
- on an host operating system for others (guest) applications and operating systems.
- It supports operating systems: Windows, Linux 2.x, FreeBSD, OpenBSD, Solaris, OS/2.
- There are two different versions available: an open source and a proprietary.
VirtualBox-OSE
[edit | edit source]- Debian has Open Source Edition of VirtualBox in its repositories.
- 1. Installation:
apt-get install virtualbox-ose virtualbox-ose-source virtualbox-ose-qt virtualbox-ose-dkms dkms
- 2. Run it from: Menu-> System-> VirtualBox OSE
VirtualBox
[edit | edit source]- The proprietary version is available to download from: http://www.virtualbox.org/wiki/Linux_Downloads
- Download a package for the highest Debian's number version means "Lenny".
- It has a few more functions then OSE version.
- 1. If you installed OSE version before, uninstall if first and next:
dpkg -i virtualbox_version_Debian_lenny.deb
- 2. Run it from: Menu-> System-> Oracle VM VirtualBox.
- 3. Accept the licence.

- Just you have to remember that sidux upgrades its system's kernel often so it's necessary to re-compile
- "vboxdrv" module after kernel upgraded. Make it in terminal as root:
/etc/init.d/vboxdrv setup
Guest system
[edit | edit source]- Now you can create a guest system - run a Live CD and/or install a system.
- 1. To do so click on: New

- 2. It will open a wizard-> Next

- 3. Type a new machine name, choose OS type and version-> Next

- 4. Select the amount of RAM memory for guest OS-> Next

- 5. Create new virtual hard drive (or use an existing drive if you have any)-> Next


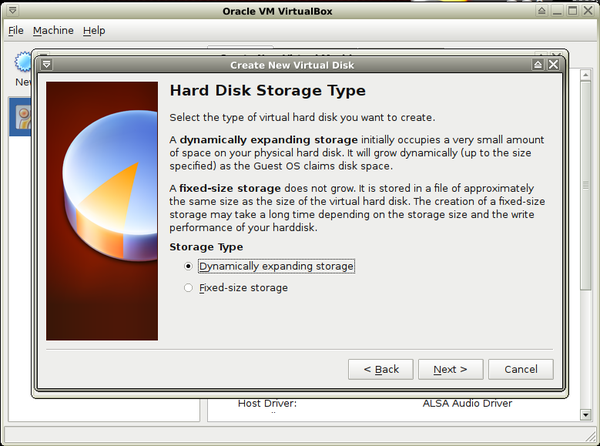
- 6. Now choose that a virtual disk will be:
- a. Dynamically expanding storage - it'll use as much computer drive as the virtual disk will use.
- b. Or Fixed-size storage - it'll use as much computer drive as you'll choose on next step.

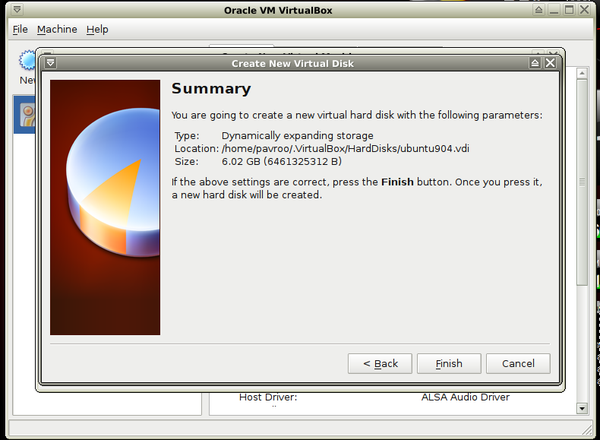
- 7. Select new virtual disk size (and location if you want)-> Next

- 8. And finish configuration.


- 9. Go to Settings now-> Storage-> Host drive and choose CD drive or "iso" image.

- 10. Shared folders-> add a folder/folders from the host system to share.


- 11. Start the virtual system now.


- 12. And install it if you want.


Guest Additions
[edit | edit source]- "Guest Additions" package install optionally; it provides a few extra functions: a mouse integration
- for host and guest systems, sharing files and USB devices access (USB for proprietary version only).
- It has to be installed for host and guest system as well.
- 1. For open source version install "Guest Additions" packages on host system:
apt-get install virtualbox-guest-additions virtualbox-ose-guest-dkms virtualbox-ose-guest-source
- 2. You don't need to install anything for proprietary version, installation package provides it.
- 3. Now you should install it for the guest system.
Linux OS as a guest
[edit | edit source]- I'll be working on Ubuntu 9.04 installed before as a guest system.
- 1. When the guest system has been run choose from VirtualBox window's tab: "Devices-> Install Guest Additions..."
- so it'll mount the package inside of the guest system in virtual CD drive.
- 2. Go to the guest system and install it in Terminal as root:
cd /media/cdrom0
su or sudo
./autorun.sh

- 3. Now restart the guest system to activate changes.
Sharing folders
[edit | edit source]- 1. To have an access to sharing folders in guest system (Ubuntu) you have to:
- a. Create "vboxusers" group for a guest system's user in Terminal:
sudo groupadd vboxusers
- b. Add guest system user for "vboxusers" group:
sudo adduser user_name vboxusers

- c. After that log off and log in again to activate changes.
- 2. Now create new folder, for example: "vb" in home catalogue:
mkdir /home/user_name/vb
- a. Or use Thunar file manager to do so.
- 3. In next step mount shared folder inside "vb" folder:
sudo mount -t vboxsf shared_folder_name /home/guest_system's_user_name/vb

- - "shared_folder_name" is a folder you selected creating new virtual machine Guest system/10.Shared folders
- 4. Now you can open shared folder in:
- a. Terminal - run it as root:
sudo mc
- and go to:
/home/user_name/vb

- b. Nautilus file manager - go to home folder, right click on "vb" folder and choose: "Open as root".
- 5. If you want to mount shared folder permanently, add a line below as root:
shared_folder_name /home/guest_system's_user_name/vb vboxfs defaults,auto 0 1
- to a file:
/etc/fstab
- Don't forget to use "Tab" key not "Space".
Windows OS as a guest
[edit | edit source]- If you installed Windows (XP for example) as a guest system, run it normally and install Guest Additions.
- 1. Mount "iso" image of the package in the same way like for Ubuntu.
- 2. Windows should detect virtual CD and run Guest Additions installator itself.

- 3. You have to agree with the licence-> I Agree.

- 4. Let the installator works.


- and re-boot the guest system after.

Sharing folders
[edit | edit source]- To have an access to shared folders in Windows guest system you have to:
- 1. From menu Start choose: "Run" and type "explorer" into the field.
- 2. Next choose from left panel: My network place-> Whole network-> VirtualBox Shared Folders->
- -> \\VBOXSVR\user_name - Explorer should display all shared folders.

- VirtualBox home page: http://www.virtualbox.org/
- On Wikipedia: http://en.wikipedia.org/wiki/VirtualBox
- Oracle VirtualBox User Manual: http://www.virtualbox.org/manual/UserManual.html
- About virtual machines on Wikipedia: http://en.wikipedia.org/wiki/Virtual_machine
