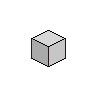
Isometric Pixel Art/Printable version
| This is the print version of Isometric Pixel Art You won't see this message or any elements not part of the book's content when you print or preview this page. |
The current, editable version of this book is available in Wikibooks, the open-content textbooks collection, at
https://en.wikibooks.org/wiki/Isometric_Pixel_Art
About
About FAQ Intro 1 2 3 4 5 6 7 8 9 Gallery
This Wikibook is a collaboration of several authors, which include:
Contributions Include: Title Page Graphic 2/8/06 Version, Introduction Page, Making your First Box page, Some more things to do with the box Page and graphics (ISO_Skyscraper.GIF, ISO_ChessBoard.GIF)
Contributions Include: Outline, Revised Title Page Graphic (Also Done on2/8/06), Pictures for Making your First Box page,
Contributions Include: Some information on the Basics of Isometric Pixel Art on 9th February 2006
About FAQ Intro 1 2 3 4 5 6 7 8 9 Gallery
FAQ
About FAQ Intro 1 2 3 4 5 6 7 8 9 Gallery
Is pixel art out-dated?
[edit | edit source]Technology is used to create art, but once art exists, it transcends technology. Pixel art exists as a technique, and it remains infinite in potential. Pixel art is not replaced by any other newer art forms but rather exists alongside them and offers unique stylistic properties. It also allows for distinct individual artists' styles.Well-loved video game art from the pixel art era will remain celebrated and rediscovered indefinitely.In addition, with the rise in popularity of mobile phone games, pixel art has resumed its practical status. Thriving enthusiast and hobbyist communities also exist online.
Do I have to buy a special program?
[edit | edit source]By all means, NO! Do not go out and buy a program just for this Wikibook. Most Operating Systems come with a pixel-based art program and it is easy to obtain one for free if you do not have one.
About FAQ Intro 1 2 3 4 5 6 7 8 9 Gallery
Introduction
About FAQ Intro 1 2 3 4 5 6 7 8 9 Gallery
An Introduction
[edit | edit source]Pixel art is anything drawn in the medium of computer pixels, usually created one pixel at a time. Because of this, pixel drawings are usually done on a small scale to save time.
Isometric pixel art is the use of pixel art in an isometric viewpoint. Alternate or exaggerated perspective is rarely used in isometric pixel art, as it complicates the drawing process.

Drawing Programs
[edit | edit source]The are numerous computer graphic programs available today. Because of the relatively simple process of creating pixel art, one need not be picky about what they use to create it.
- MS Paint will generally work well, though it lacks several features (translucency, layers) that more complex programs may provide
- Photoshop or other programs of the sort (Paintshop Pro, GIMP, Krita) work well, though their line tools may use vectors or otherwise complicated methods of drawing. Many features (such as automatic anti-aliasing) must be turned off in order to pixel with these programs.
- Programs designed specifically for creating pixel art are also available, such as mtPaint, GrafX2, and ASEPRITE. The latter is commercial, but open-source.
- Pixen is a great free app for Mac users.
- Pixelesque is a good pixel art editor for Android and Android-compatible systems(CyanogenMOD, Replicant). It is limited to art of 64x64 pixels or smaller.
About FAQ Intro 1 2 3 4 5 6 7 8 9 Gallery
Making a Box
About FAQ Intro 1 2 3 4 5 6 7 8 9 Gallery
's the different methods of making this box. There are a couple different ways of putting it together:
[edit | edit source]- The Puzzle Piece Method (Recommended for this Tutorial): Make the separate lines (the x, y, and z axis) and put them together like a puzzle using copy and paste to duplicate the lines. Good for uniformity and if you aren't making different length of your lines.
- The Line by Line Method: Create each line individually. Good if you don't like using copy and paste or if your shape is not uniform (like a person or animal) but is extremely easy to mess up.
- (Not Recommended for this Tutorial)Pixel by Pixel Method: Pros: Makes for really good quality pictures with unparallel uniformity, if done right. Cons: Takes an extremely LONG TIME.
Math? IN ART?
[edit | edit source]That's right! We are going to do a quickly lesson in geometry. For your pixel line lengths, I suggest them being multiples of each other (ex: 2 x 2 = 4; 2 x 3 = 6). This makes it look more like a real cube. Also, we must remember that the lines must be of equal length for it to be a real cube. Isometric lengths make this really hard to do, because each axis has a different scale (ex: The X axis (up and down)compared to the Y axis (left to right)are equal, but they are both different from the Z axis (forward and backward)). Eyeball it and find out what looks right to you.
- The "Golden Rule" of Isometric Pixel Art is that for every 2 pixels in the Z axis (front to back) there is one pixel for the X or Y axis (up and down, left and right). Although this may not always work for every single thing you draw isometrically, it is the general rule so remember it!
Let's Begin!
[edit | edit source]


Congratulations! You've just made your first isometric drawing!
About FAQ Intro 1 2 3 4 5 6 7 8 9 Gallery
Shading the Box
About FAQ Intro 1 2 3 4 5 6 7 8 9 Gallery
Isometric boxes, even if they're made of straight lines, can be made prettier through the use of shading.
Here we will learn about light sources and why the heck they're so important. If you leave off light sources, the whole picture will be off. So without further ado...
Let's Begin!
[edit | edit source]
First draw a cube and pick your colors, each getting gradually lighter. There should be at least three, but you can toss in a fourth one if you want to do the last step (entirely optional). Shadows are usually less saturated than the other colours, but here i have kept the saturation high for stylistic purposes. Now pick your light source. I chose the upper right corner and drew a sun there to remind me where it is.

Flood-fill the spot that's facing away from the light source the most, in this case, the side I've labeled "1". Side "2" should have your next darkest color, and then side "3" should be lightest.

Swapping the light source should also swap your colors on the box. I put the sun in the left corner and mirrored the box to make it face the light source.

If you want to make it look a little different, take color number four and draw on all the black bits that ARE NOT touching the edge. The edges should remain black.
Hey, you did it!
Of course you can experiment with different positions for the light source. Remember to practice with the "sun" in different places so you get the hang of shifting the colors.
About FAQ Intro 1 2 3 4 5 6 7 8 9 Gallery
Other Boxes
About FAQ Intro 1 2 3 4 5 6 7 8 9 Gallery
Wondering what you can do with that silly old box? Here's some examples.
Skyscraper!
[edit | edit source]Make the Y axis lines longer and check it out! It's now a skyscraper!
Chessboard!
[edit | edit source]Make the boxes black and white and make a chessboard!
Table!
[edit | edit source]Make a rectangle composed out of boxes (2 x 3 should do)
Make a "flattened" box (less X axis)to make the table top.
Then erase the middle lines in the front of the rectangle.
Turn the three lines on the outside into legs and erase all the lines on the bottom.
A table! Yay! Perfect for fancy dinner parties. Well, maybe not yet.
First we have to talk about detailing.
About FAQ Intro 1 2 3 4 5 6 7 8 9 Gallery
Other Shapes
Now that you've shaded a cube, you can make other shapes (cones, rectangles, spheres) and shade them too.
Cones

Star the cone by drawing a flat-ish oval shape on the ground. Give the oval a center of one, and use the center to make the point of the cone. Connect the outermost sides of the oval to the point, and there's your cone. To shade it, use your four colors and the sun, add spots where the light is brightest.
Rectangles
Similar to cubes, just lengthen one side and shade it according to the sun's position. In the example, I added two colors on the same face of the rectangle that is facing the side, to give some depth as to where the sun is.
Spheres
For this, I drew a circle, then the sun, and shaded it by using lighter colors for the area closer to the sun. The example is shaded in a circular shape to give off that 3D look, and show it's a sphere.
Car

Now that you've gotten some more experience, you can make a car! In this case, it's a Land Rover, as it's the only car I could find that was boxy and was facing the right way.


We'll start by drawing the cubes for the base of the car. Instead of being by 2s, I'll be using 3s, as it fits the slope of the car better.
