Kitchen Remodel/Cabinet installation trouble shooting
|
In this chapter, I will write about some problems that we expectedly or unexpectedly faced during our kitchen installation, and how we solved them.
A too low stretch of ceiling
[edit | edit source]
An expected cause of trouble that we had to cope with during our cabinet installation was the low ceiling above the refrigerator/oven row of cabinets and in the pantry space. It has a height (concrete floor to ceiling) of 83" (221 cm). The cabinets are, without legs, 80" (203 cm), and the legs require at least 3½" (9 cm). The European version of those legs would have saved us, since they require only a minimum of 2¾" (7 cm), but those are not available in the U.S.
As I already mentioned in the previous chapter, we solved this problem by cutting the legs down to the length that we needed. For additional support, we also used brackets for island support and a great many screws that went into the walls, into the ceiling and from one cabinet into another.
A slanting stretch of ceiling
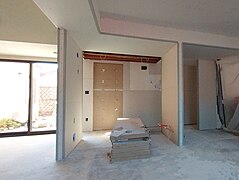
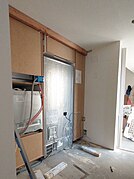
[edit | edit source]I designed the space that is shown in the first image below to accommodate a row of high cabinets, including our refrigerator, the oven and the microwave oven.
Originally, I had planned to align those elements with the front edge of the dropped ceiling. Then we noticed that this dropped ceiling isn't level but slopes down to the right by half an inch. There was no way aligning it with the top edge of the cabinets.
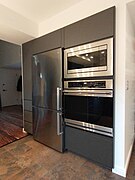
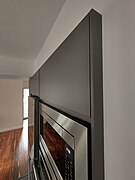
We fixed that problem by moving the entire cabinet block one inch forward into the kitchen space and covering its vertical edges with two strips of cover panel. The ceiling is still slanted, but the cabinets cover it now.
-
The designated space
-
After completion
-
Notice the cover panel at the side of the cabinet.
A not wide enough space
[edit | edit source]Some of the grief that the installation of our kitchen cabinets gave us, came from my incomplete knowledge of Ikea's 153° hinges. For the "extra", a pair of 18" high cabinets, we had designed a a special recess with walls at both sides. That recess was not too narrow to hold the cabinets – they went into their places without a problem –, but after we mounted the first door, we noticed that it wouldn't open wide enough to allow the drawers which lay behind this door to open.
The solution was not the most elegant, but for our purposes it is absolutely sufficient: Instead of mounting those doors to the exterior sides of the two cabinets, we used the interior sides. Since these are wide opening hinges, the access to the cabinets' interior is virtually not impaired. The only downside is that the two doors cannot be opened at the same time.
-
The space was wide enough to fit the cabinets, but not wide enough to mount the doors to the exterior positions.
-
So we mounted them to the interior positions…
-
…which works fine…
-
…since the doors open very wide.
Another not wide enough space
[edit | edit source]
It never rains but it pours. The most severe problem that we had to deal with, arose during the installation of our pantry row of cabinets. Those were supposed to fit between two walls: one that was already there before the remodel and another one we had newly built just for this purpose. The row includes 3 high cabinets of 30"+30"+18", which add up to 78". We directed our contractor to position the new wall accordingly and to also add a little extra margin for safety.
We got a width of 78¼".
Guess what, that was not enough. What we had not considered was:
- That the left-most cabinet had to be removed from the wall ¼" (6 mm) so that its left door can be opened (see section above). Flipping of hinge sides not possible in this case, because the cabinets have pairs of doors.
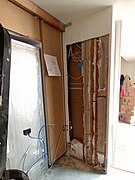
- The old wall, the one at the right side, turned out not be vertical but to lean outwards, with its lower half getting in our way.
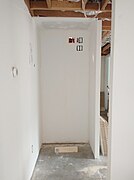
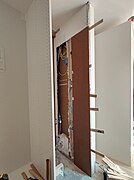
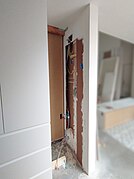
My first idea was to tear the half-inch-drywall down on the right-hand wall and to replace it with the thinnest drywall that was available. But even that would not have been enough. Since we were not inclined to modify both walls, just to reap the needed fraction of an inch, we decided not to use ¼" drywall, but hardboard, which is only 1/8" thick. This did the trick, it works fine and isn't even noticeable.
-
This wall had to be modified.
-
After ripping off most of the drywall
-
Hardboard instead of drywall
-
Only so much material as to beautify what would be visible
-
With the cabinet in place
-
On completion
One possible alternative would have been to shave the cabinet to size. That we didn't want to do because it might have compromised the functionality of the cabinet's door.


